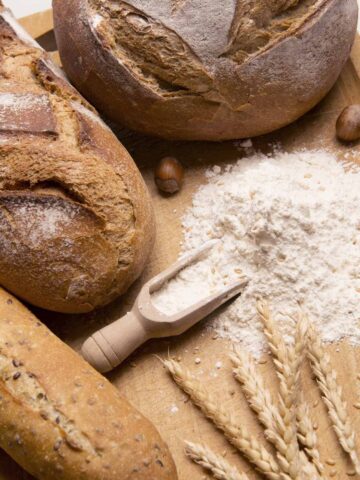
This Easy Italian Spelt Bread is a light, rustic loaf with a rich flavor and great texture, made using spelt flour and instant yeast so it comes together faster. Baking it in a Dutch oven gives you a crisp crust and soft, airy crumb-like artisan bread right at home.

This post may contain affiliate links, which means I may make a small commission off items you purchase at no additional cost to you.
If you like homemade rustic breads, this loaf shares the comforting feel of Homemade Pizza Dough and the wholesome flavor of Spelt Pasta-simple, hearty, and deeply satisfying.
Check out also this Easy Guide to Italian Bread Types and our entire Bread & Savory Pies category.
Jump to:
🧾 Ingredients
- Spelt Flour - Whole spelt flour lends a nutty, slightly sweet flavor; you can use light spelt for a lighter texture.
- Instant Yeast - Easier and faster than fresh or active dry; helps the dough rise reliably without long proofing.
- Warm Water - About 100-110°F (38-43°C) to activate yeast; overly hot water kills yeast.
- Salt - Enhances flavor; avoid too much so yeast can do its job.
See the recipe card for quantities.
🍳 Substitutions
- Use half spelt / half whole wheat flour if pure spelt is too dense.
- Replace spelt entirely with bread flour if spelt is unavailable (texture will change).
- Use active dry yeast instead of instant-just dissolve in water first and allow extra rise time.
- If you don't have a Dutch oven, use a heavy lidded pot or a covered baking dish to mimic the steam effect.
🥣 Variations
- Herb Spelt Loaf - Stir in fresh herbs like rosemary or thyme to the dough.
- Garlic & Olive Oil - Brush with olive oil and rubbed garlic before baking for extra flavor.
- Seeded Crust - Sprinkle pumpkin, sunflower, or sesame seeds on top of loaf for crunch.
- Whole Grain Spelt - Use whole spelt flour for a more rustic loaf (may need more water).
📋 Instructions with Photos

Step 1. Mix ⅓ of the flour with the yeast and ⅓ of the water. Let rise 30 minutes.

Step 2. Add the remaining flour, water, and salt, then let rise 10 minutes.

Step 3. Once risen, stretch and fold the dough into a loaf. Let rise another 10 minutes.

Step 4. Stretch and fold the load again then move to the rising basket and let rise for 2 hours.

Step 5. Move the loaf into the hot dutch oven with the parchment paper and score the top.

Step 6. Cover the dutch oven with the lid and bake for 35 minutes, then remove the lid and bake until golden brown.

🍽 Serving Suggestions
Serve this bread warm, sliced, with butter or olive oil and a sprinkle of sea salt. It goes beautifully with soups, stews, or pasta dishes. Also great for sandwiches or simply alongside a vegetable or cheese plate.
🔪 Equipment
- Dutch Oven - The key to getting bakery-style bread at home is baking in a Dutch oven. Its thick walls retain heat and the heavy lid traps steam, which helps the loaf rise beautifully and develop that crisp, golden crust. If you don't own one yet, this is one kitchen tool worth investing in - you'll use it for soups, stews, braises, and, of course, artisan bread. Check this special cast iron dutch oven for bread baking including accessories.
❄️ Storage & Reheating
Fridge: The bread will stay fresh wrapped in a cloth or in a bread bag for 2-3 days. Spelt can dry out faster, so wrap well.
Freezer: Once fully cooled, you can slice and freeze. Wrap tightly and store for up to 2 months.
Reheating: To refresh, preheat oven to 350°F (175°C), spritz the loaf lightly with water or wrap in foil, and warm for 10 minutes. Crisp crust returns nicely with uncovered warming for last few minutes.
💭 Recipe FAQs
Spelt has weaker gluten than common wheat, so dough is softer and can spread more. Handle gently and avoid over-kneading.
Yes! Preheating the Dutch oven (dome + bottom) helps give the bread a crisp crust when you place the dough inside.
You can. After mixing and kneading, cover and refrigerate overnight for a slower rise. Bring to room temp and proceed with shaping + final proof before baking.
⭐ Top tip
Keep the dough slightly sticky - a bit tacky helps spelt bread maintain moisture and rise better. Use light flouring only on your hands and work surface to shape, and avoid adding too much dry flour which can make the loaf dense.

🫶 Related recipes you might like
Looking for other recipes like this? Try these:
If you tried this recipe, please take a moment to rate it and share your thoughts in the comments. Your feedback means a lot to me! ★★★★★
📖 RECIPE
Ingredients
Equipment
Method
- In a large bowl, mix ⅓ of the flour with the instant yeast, and ⅓ of the water. Stir until just combined then let it rise covered in a warm place for 30 minutes.
- After the first rising time, add the remaining flour, water (a bit at a time until you reach the right consistency), and salt. Let it rise covered for another 30 minutes.
- Once risen, gently turn the dough out onto a lightly floured surface, shape into a round loaf. Let rest/uncovered for 10 minutes.
- Stretch and roll the dough again into a loaf, then let it rest again another 10 minutes.
- Do the same stretch and roll, but this time cover the loaf in flour and move it into the rising basket. Let it rise for about 2 hours.
- Meanwhile, place your Dutch oven (with lid) in the oven and preheat oven to 450°F (230°C).
- Carefully remove hot Dutch oven, place the loaf inside (on parchment if you like) seam side down. Make a few shallow slashes on top with a sharp knife. Cover with the lid and bake for 35 minutes.
- Remove the lid and bake for another 5-10 minutes until the crust is golden brown.
- Remove the loaf and let it cool on a wire rack for at least 30 minutes before slicing.
Nutrition
Nutritional information is only an estimate. The accuracy of the nutritional information for any recipe on this site is not guaranteed.
Notes
- Not all flours are the same, plus altitude may affect the end results. Add water a little bit at a time to reach the right sticky consistency of the bread dough. If you're unfamiliar with bread baking it might take a couple of trials and error to get the right result.
- Remove the baked bread immediately from the dutch oven and let it cool on a rack to avoid overbaking it and get a gummy texture from the steam.
- A cast iron dutch oven is preferred over an enameled duct oven since some manufacturers don't recommend preheating empty enameled dutch ovens.
- If you get a tough bottom crust, next time try putting a baking sheet on the bottom rack of the oven to reduce the heat. Not all ovens are the same.

Lily says
I never tried spelt bread before but I loved the rustic flavor. It came out perfect, crunchy and soft inside!
Jessica Montanelli says
I'm glad you enjoyed it! 🙂