An easy guide to embroider any text and font on any type of shirt or t-shirt. You only need a hoop and thread and print one of the printable templates to start customizing your clothes immediately!
This post may contain affiliate links, which means I may make a small commission off items you purchase at no additional cost to you.
I love trying new hobbies and learning new skills. Usually, I don't go through with it for much longer but at least I can put it in my skills jar and know that whenever I want to try something with it, I can do it.
I tried embroidery a few weeks ago and while loving the results, I find the process too slow and tedious for my taste. So it's not something I would do regularly but only when I see or think of some cool ideas that I want to realize.
On Pinterest, I saw many embroidered clothes but it's usually always with flowers. I wanted to do something different so I thought of embroidering text on a t-shirt.
The Fabric
The t-shirt that I used for my project was not the classic cotton t-shirt (that would have been way too easy) but it's a very thin and stretchy cotton-polyester t-shirt. It was very difficult to work with but the result is surprisingly good. Anyway, I would absolutely suggest you use a 100% cotton t-shirt which is more firm and way easier to embroider.
The Text
Yes, you can embroider any text you want but I would take into consideration a few things:
- Hoop size: If you want to embroider a lot of text on your t-shirt, you can either embroider separate portions, move the hoop, or buy a big enough hoop to fit the whole text. I suggest the second option as it's easier to keep the hoop still instead of moving it around.
- Text size and font: Use fairly simple fonts, the more swirly and fancy they are, the more difficult it will be to embroider and to read afterward. The same is for the size. I suggest the letters be at least 1.5-2 cm (½ inch) big to be easy to embroider and also easy to read. You can use a thin floss and embroider super tiny text, but what's the point if people can't read it?
How To
Step 1: Get the measurements
Take your hoop and measure the diameter (a straight line from side to side) to know how big your text can be. Take off about 2.5 cm (1 inch) from the diameter as it's difficult to embroider near the wooden frame.
I used an 18 cm (7 in.) hoop and my text was 15.5 x 9 cm (6.1 x 3.5 in.) so the max length was exactly 2.5 cm (1 inch) off the diameter of the hoop.
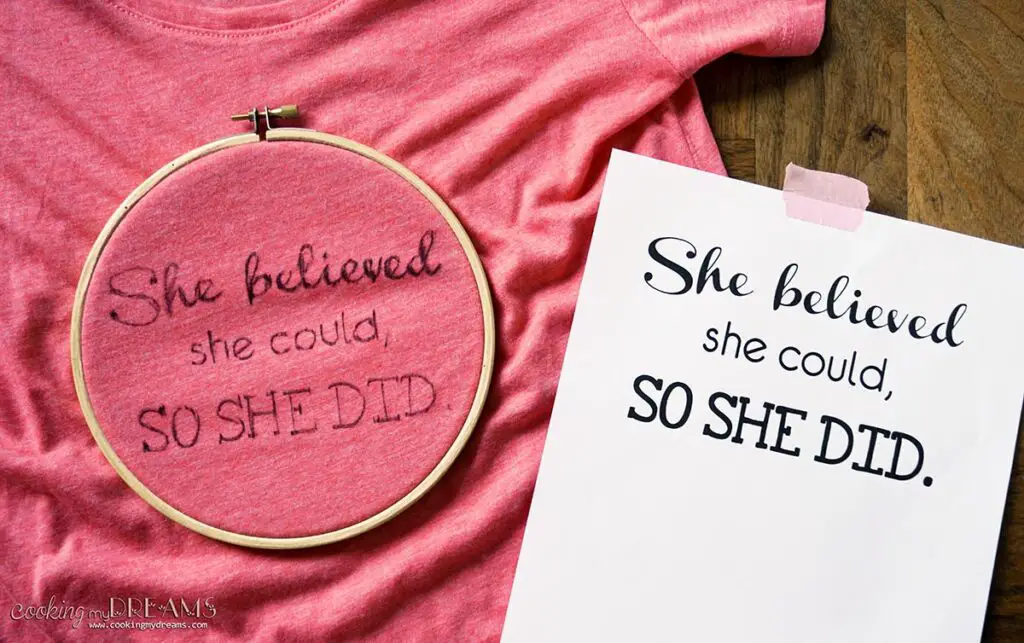
Step 2: Write and print the text
On a Word document make a square shape with the max size you can use (use the page ruler or fix the size from the shape format). Write your text in your preferred font.
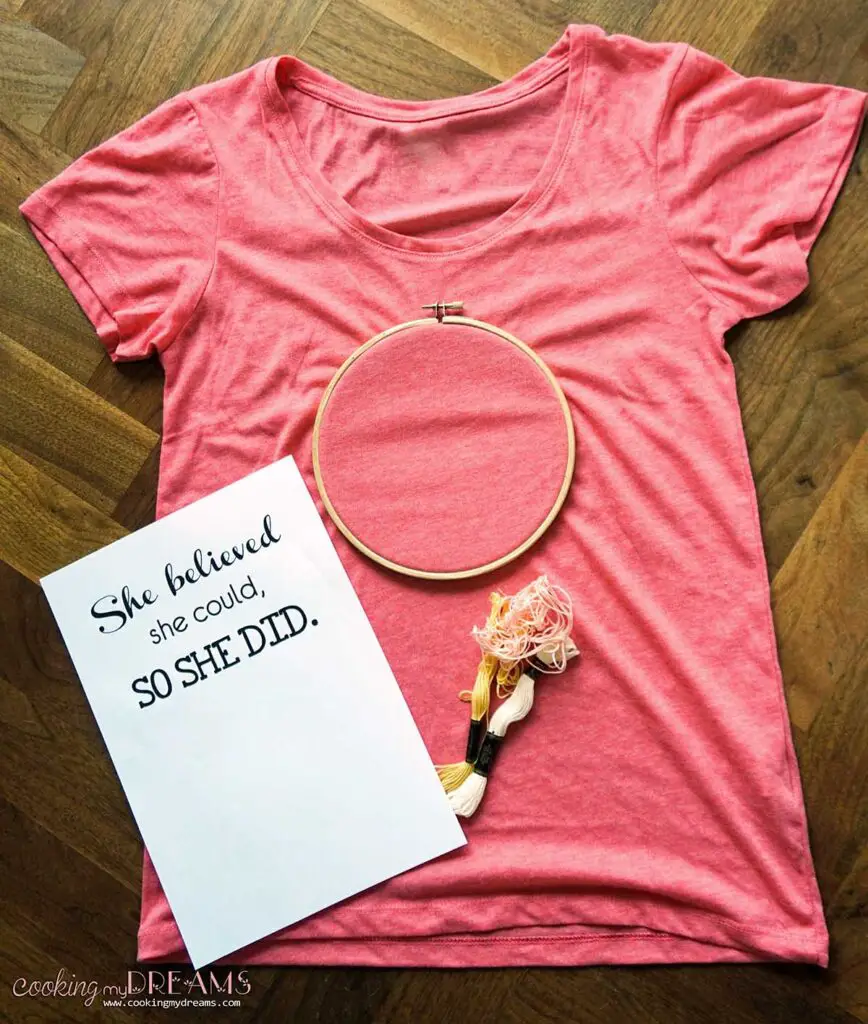
You can download the same quote I used and a few more here:
- Download "She believed she could, so she did"
- Download "There's always a reason to smile"
- Download "Not all who wander are lost"
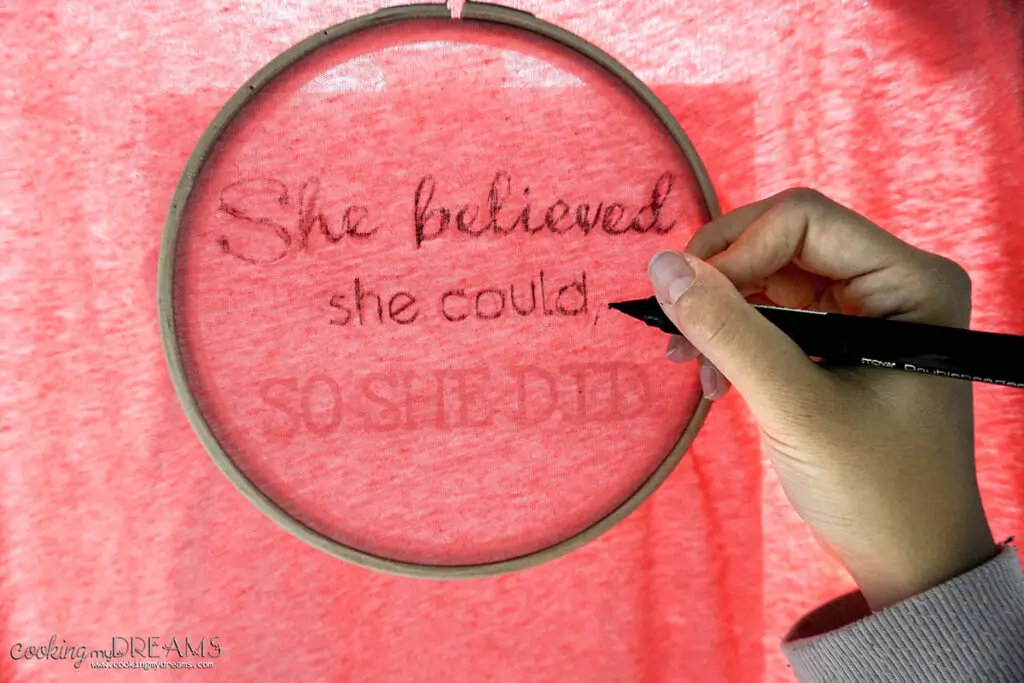
Step 3: Transfer the text to the shirt
To transfer the text to the fabric, you can use several methods (with affiliate links):
- Transfer paper: it's carbon paper mainly used by tailors. There are both dark and light versions, depending on the fabric you want to use. You simply draw on one side of the paper placed on the fabric and it will transfer the color onto the fabric.
- Transfer pencil: There are pens and pencils which transfer the color on the fabric when heated. You simply draw the design on the paper, then place it on the fabric and iron it on for a few seconds until transferred.
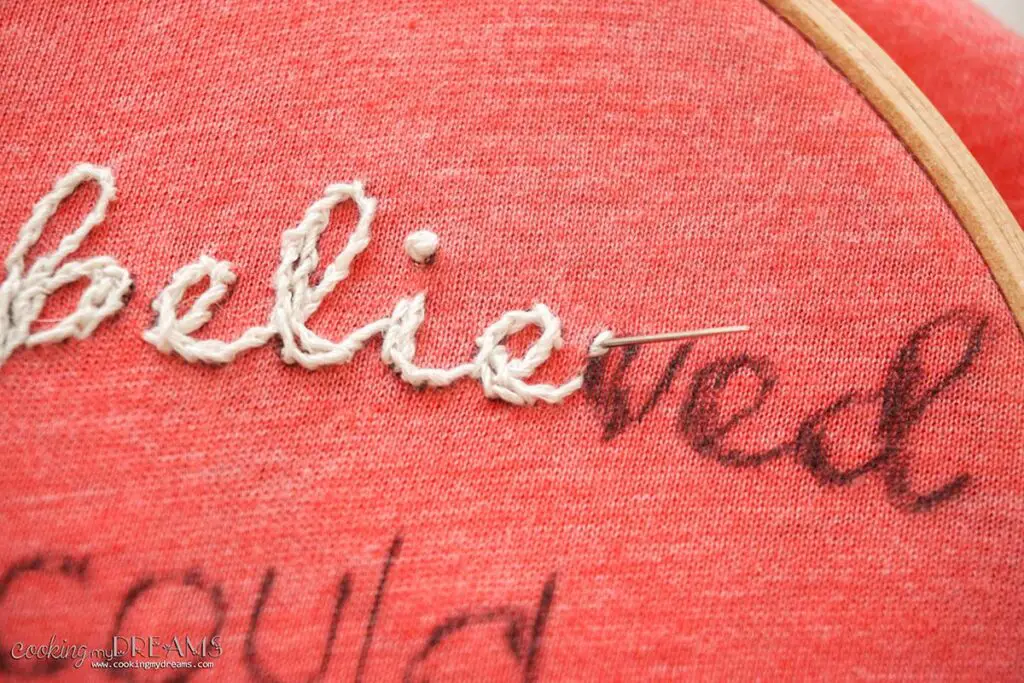
- Tracing: this is the method I used. tape the paper with the text to a window. Then tape the shirt on top of it, making sure it's straight and well stretched so it won't move. Then, using a pen or chalk or water-soluble pencil, trace the text onto the fabric.
Step 4: Embroider
You can use a variety of stitches, depending on the type of text and your taste. I used the split stitch for the whole text. But also the straight stitch, backstitch, and stem stitch are great for text.
For the split stitch:
Make a knot on the backside of the fabric as a starting point. Make a straight stitch on top, then go back halfway through the stick and make another straight stitch on top. This way the floss will be split in two, making a sort of chain effect.
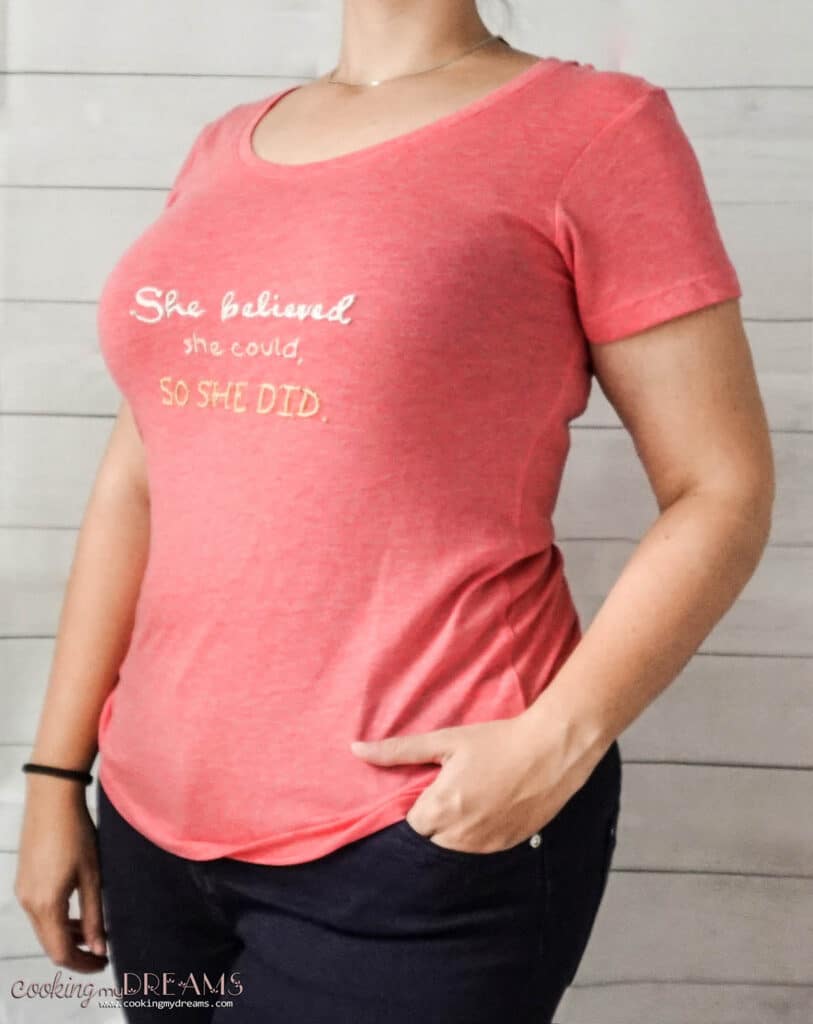
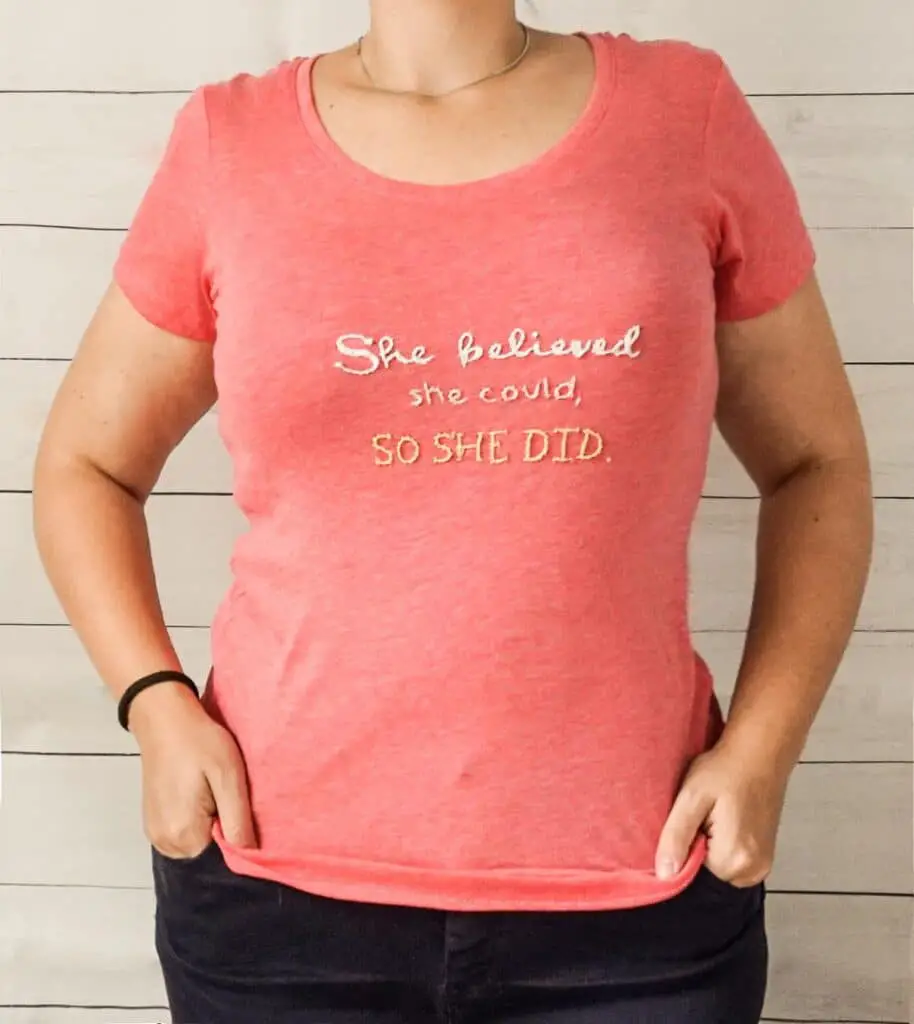
Final Result:
This was the first try and I'll practice more on a cotton t-shirt as I'm sure the result would look better. Although I'm surprised that the fabric didn't wrinkle up around the embroidery as I thought it would.


Henry Nichols says
Marvelous post have you share here about embroider text in T-Shirt. Thanks for sharing.