
Tonnarelli pasta, often referred to as spaghetti alla chitarra, is a traditional Italian pasta with a distinctive square spaghetti shape, that sets it apart from the more common round spaghetti varieties.
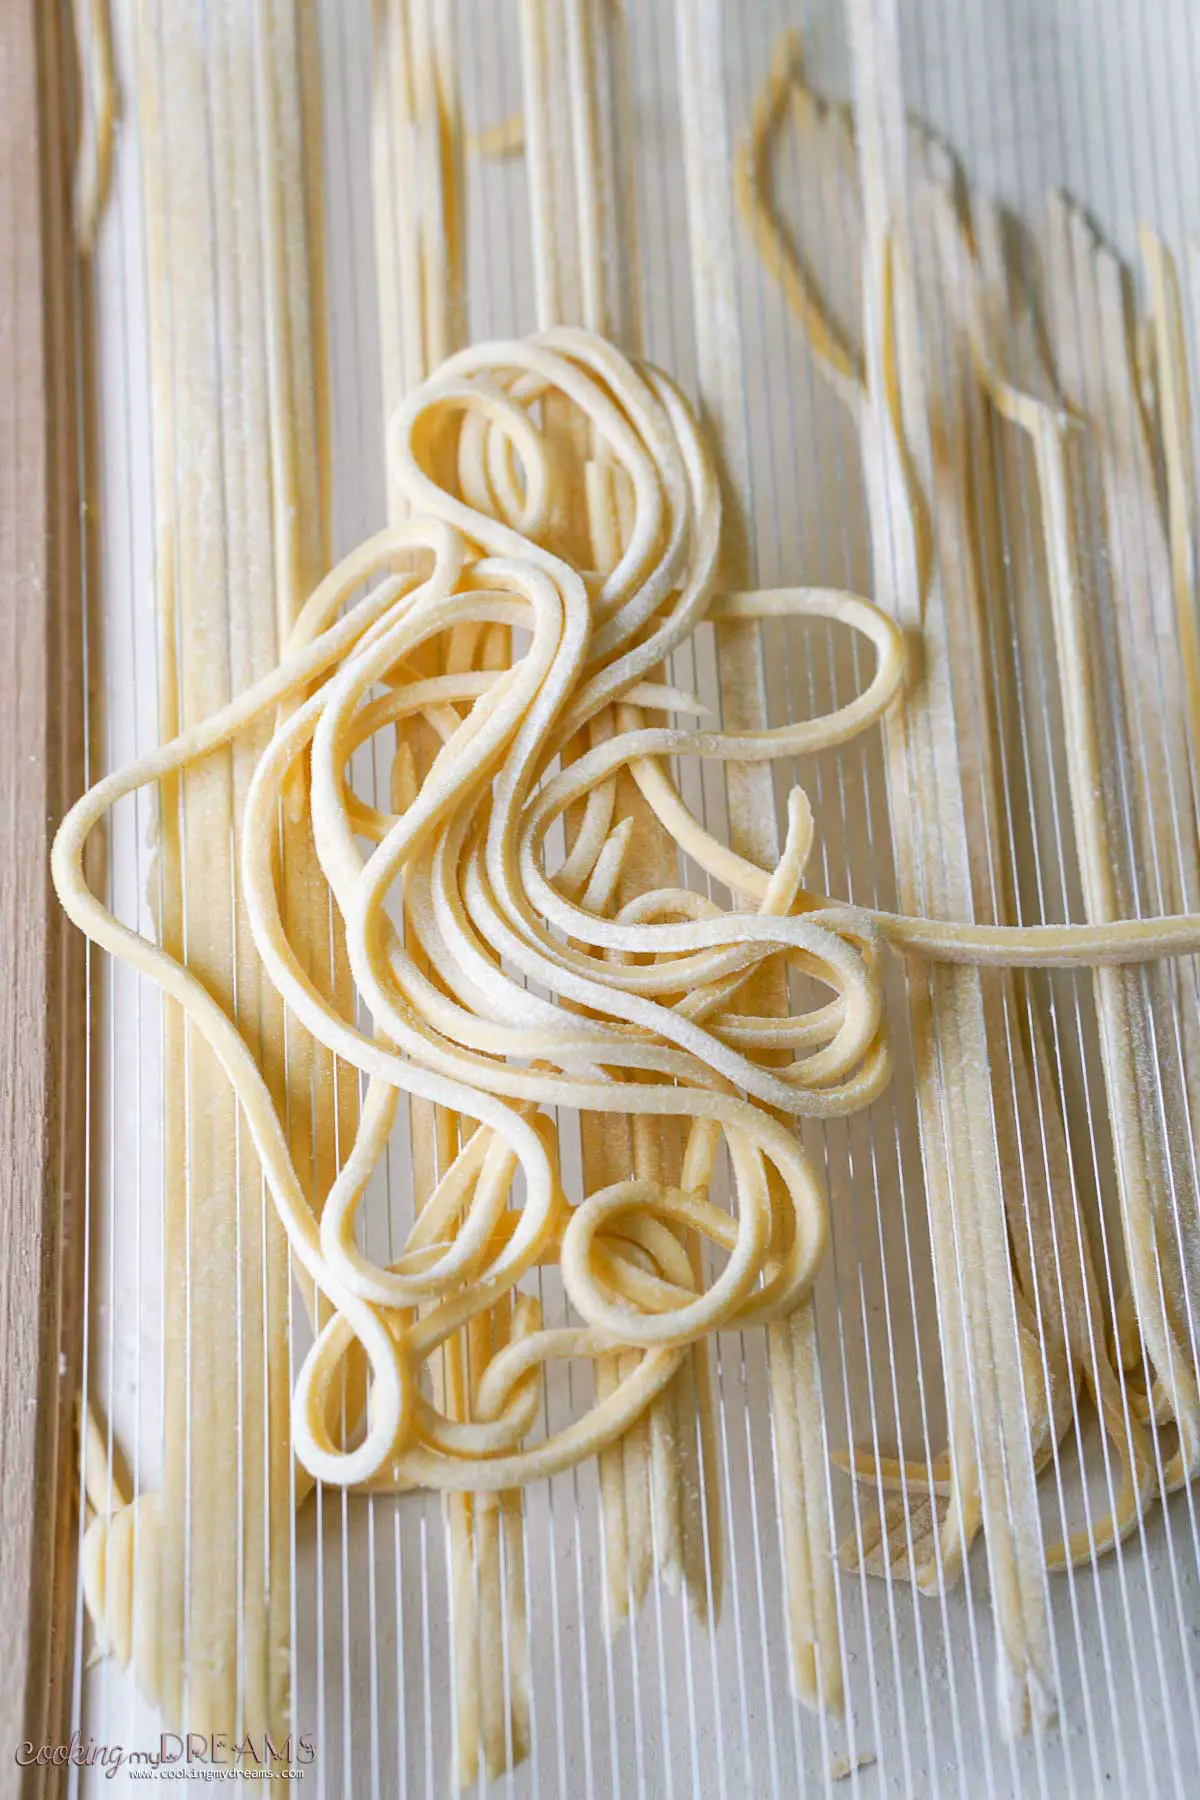
Originating from the central regions of Italy, particularly within Roman cuisine, Tonnarelli has become a beloved staple among pasta makers and enthusiasts alike. Crafted with precision and care, this durum wheat semolina pasta type is also called Spaghetti alla chitarra, named after the 'chitarra' (Italian for guitar), a tool used to cut the pasta dough into its unique square strands. Tonnarelli's delicious texture and ability to cling to sauces make it a favorite for a variety of classic Italian dishes.
If you want to make homemade pasta that is versatile and can be paired with a variety of different pasta sauces, then Tonnarelli is one of the best choices for a staple of Italian cuisine.
For more fresh pasta recipes, check out these detailed guides on how to make Trofie pasta, how to make Pici pasta, or this comprehensive guide on how to make fresh pasta without a pasta machine.
Jump to:
History of Tonnarelli
Your exploration into the history of tonnarelli leads you to central Italy, where this rustic pasta holds a significant place in regional cuisines, especially in the areas of Lazio and Abruzzo. Tonnarelli, also known as "spaghetti alla chitarra," emerge from a humble, yet cherished tradition of pasta-making, emphasizing simplicity and texture.
The origins of tonnarelli can be traced to family kitchens where making pasta from scratch was commonplace. Dating back as early as the 17th century, tonnarelli appears in historical references and local lore, which mention its use in everyday meals and festive occasions alike. It gained its notoriety for the distinctive shape and satisfying bite, attributed to its square cross-section—a shape starkly different from the common round spaghetti.
To prepare traditional tonnarelli, you would employ a tool known as a 'chitarra,' a frame strung with wires, resembling a guitar, which cuts the pasta dough into the characteristic thick, square strands. This method ensures that each strand of tonnarelli not only carries the flavorsome sauces with which it is commonly served but also retains a firm, rustic texture after cooking.
Tonnarelli Vs. Spaghetti
Tonnarelli and spaghetti may look quite similar but they're actually different. Understanding their differences will help you choose the right pasta for your sauce and taste preference.
- Thickness: Tonnarelli are generally thicker than spaghetti, measuring around 2 to 3 millimeters in width. They are actually more similar to Tuscan Pici Pasta than spaghetti.
- Cross Section: If you look closely at the cross-section, you'll notice that tonnarelli have a square shape, contrasting with the traditional round form of spaghetti.
- Texture: You may find that tonnarelli offers a slightly coarser texture which can enhance the sauce’s adherence to the pasta.
Given its thickness and texture, tonnarelli pairs well with heartier sauces that can cling to its surfaces, such as ragù or creamy sauces. Spaghetti, being smoother and thinner, is often served with oil or tomato-based sauces that coat the pasta without the need for a substantial pasta surface to bind to.
Tonnarelli, are also made with eggs, which delivers a denser bite compared to the lighter feel of eggless spaghetti noodles.
Ingredients
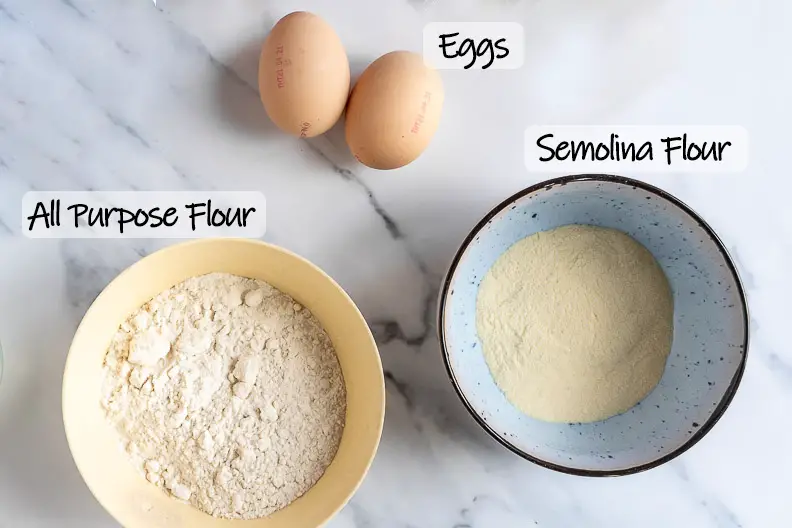
When making tonnarelli, a classic egg pasta variety from the Lazio region of Italy, you’ll need a few key simple ingredients to create its signature texture and taste. Traditionally, tonnarelli is known for its rough and porous surface, ideal for clinging to savory sauces.
Primary Ingredients:
- Flour: You should start with high-quality flour. Use a mix of semolina flour, which is made from durum wheat, to give the pasta its distinctive bite and firmness. And Italian "00" flour (most commonly found as all-purpose flour), to provide a smoother and stretchable texture. You can also use whole wheat flour for a healthier version.
- Eggs: Fresh, large eggs are crucial. They contribute to the pasta's richness and help bind the flour together.
Secondary Ingredients:
While not always necessary, these ingredients can enhance the pasta:
- A pinch of salt to enhance the overall flavor.
- A splash of olive oil can add a subtle richness and facilitate the dough-making process.
- Water: While not always used in traditional recipes, some versions might call for a small amount of water to help bring the dough together if it's too dry.
- Flavorings: Like squid ink, blended spinach or tomato paste to make flavored pasta. Check out this full recipe for Squid Ink Tonnarelli.
Remember, the quality of your ingredients directly affects the quality of your tonnarelli. Opt for the freshest and finest choices to ensure a delicious outcome.
Instructions
To craft homemade tonnarelli pasta, the process is quite simple. Begin with selecting your ingredients, starting with a mix of ⅓ of semolina and ⅔ of all-purpose or '00' Italian flour and the addition of large eggs. The basic ratio is typically about 100 grams of flour to 1 large egg, ensuring you achieve the right consistency.
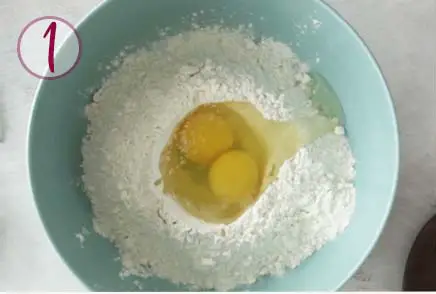
Mix your ingredients in a bowl or on a clean work surface, until they form a smooth dough. Salt is optional, and some water may be necessary if using medium eggs.
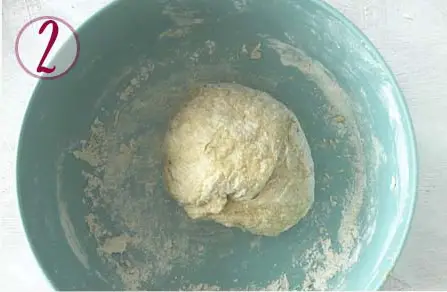
Cover the dough in plastic wrap and let it rest for about 15 minutes to develop gluten, making it easier to stretch.
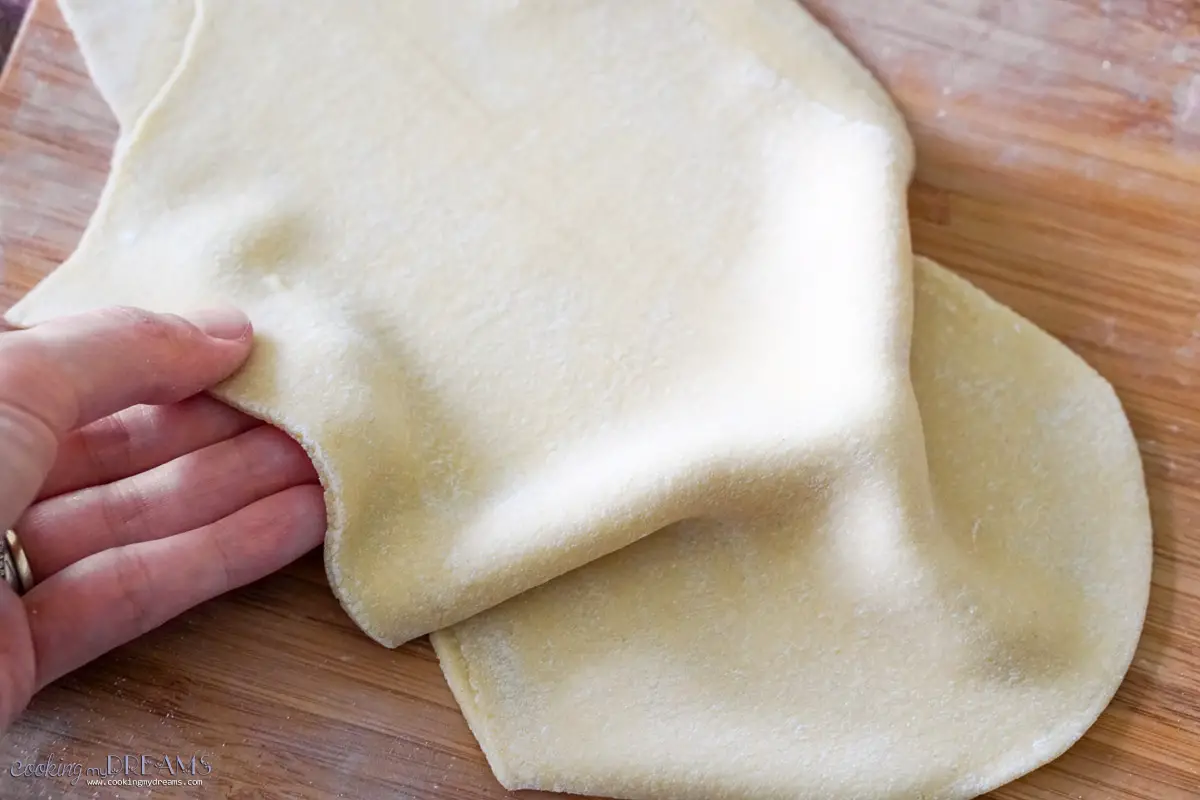
Roll the dough into a thick pasta sheet. I use thickness 4 on my Imperia pasta machine.
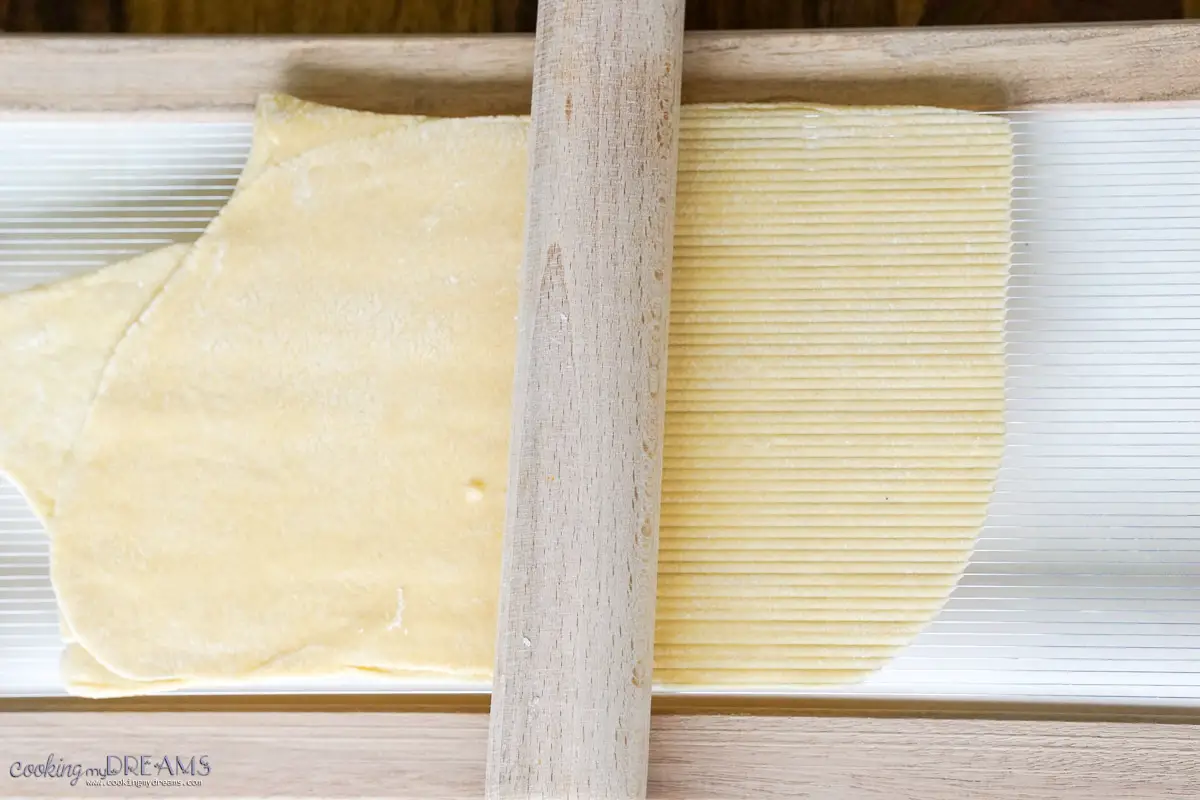
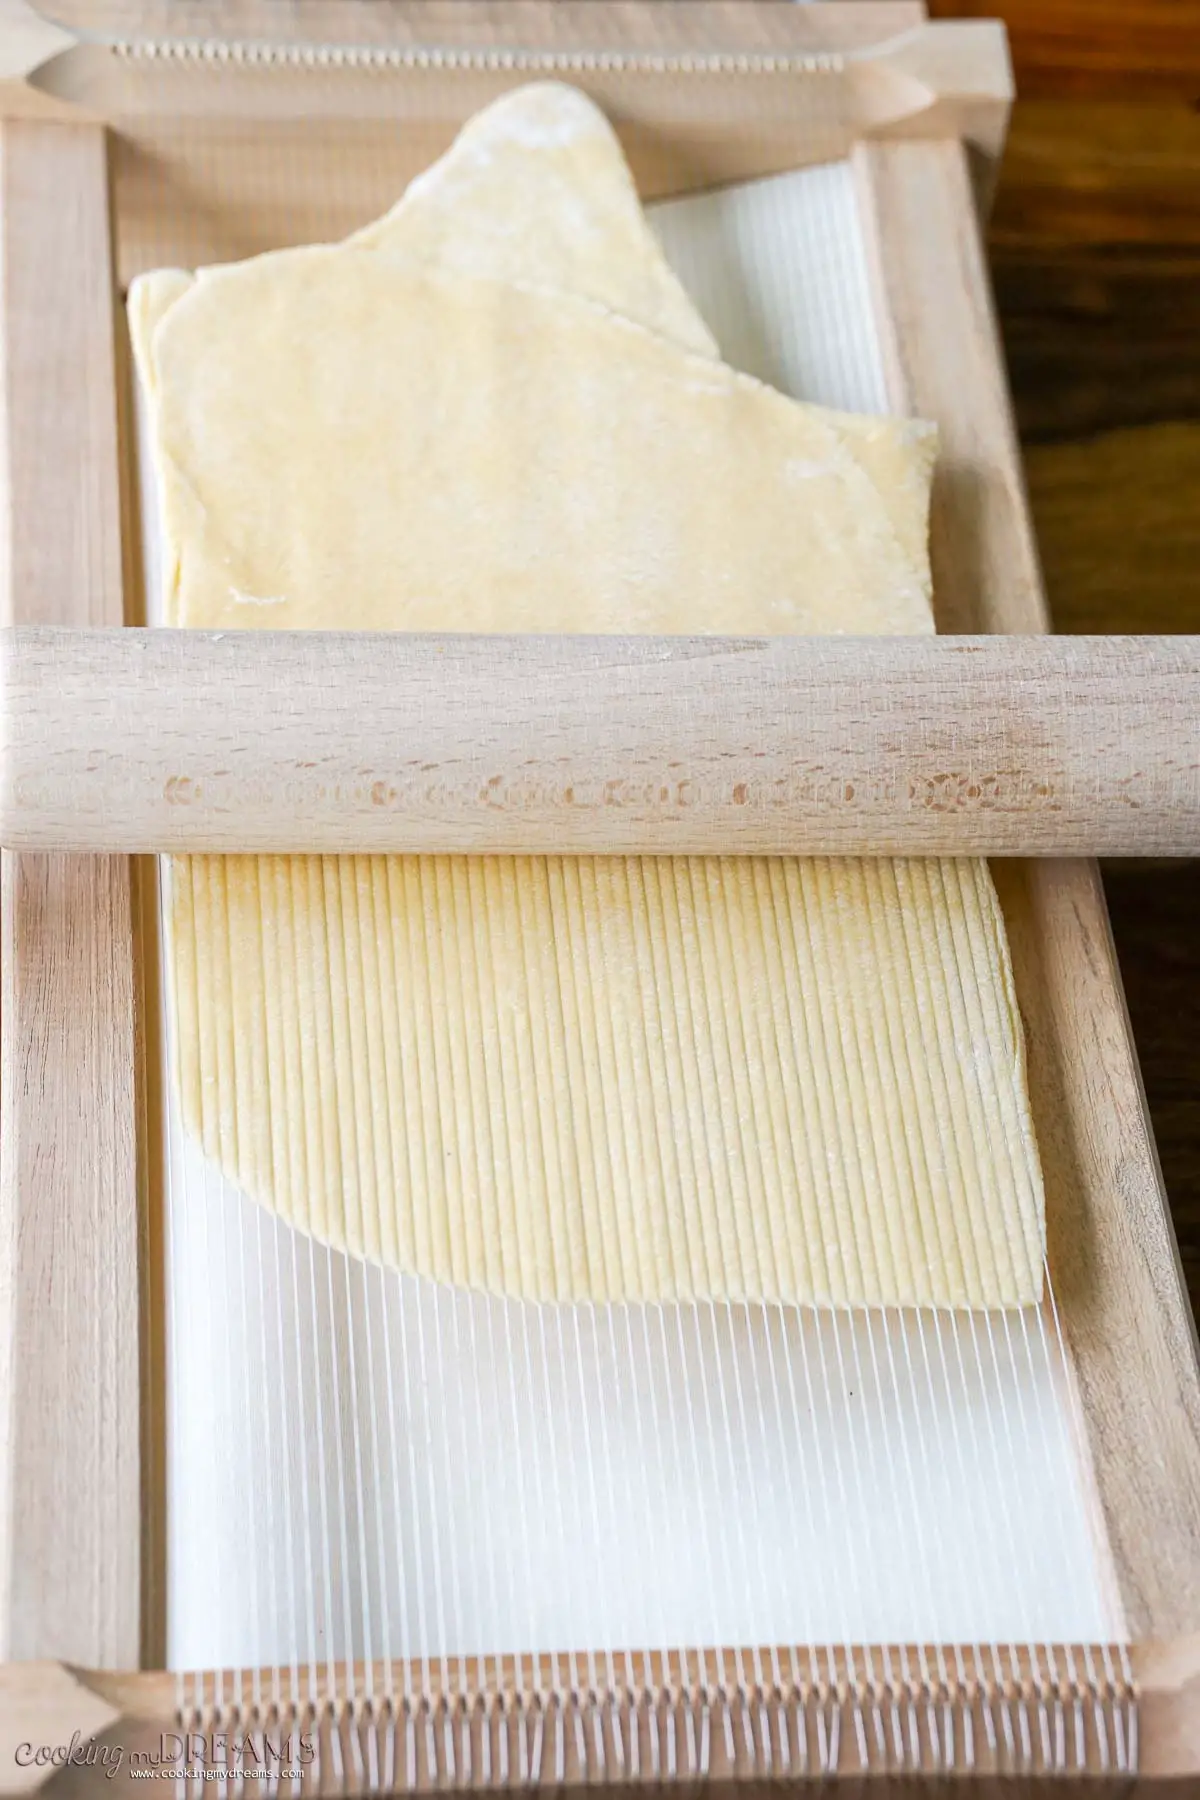
Then, Roll the tonnarelli dough with a rolling pin on the chitarra tool, or use the special extension on the pasta machine.
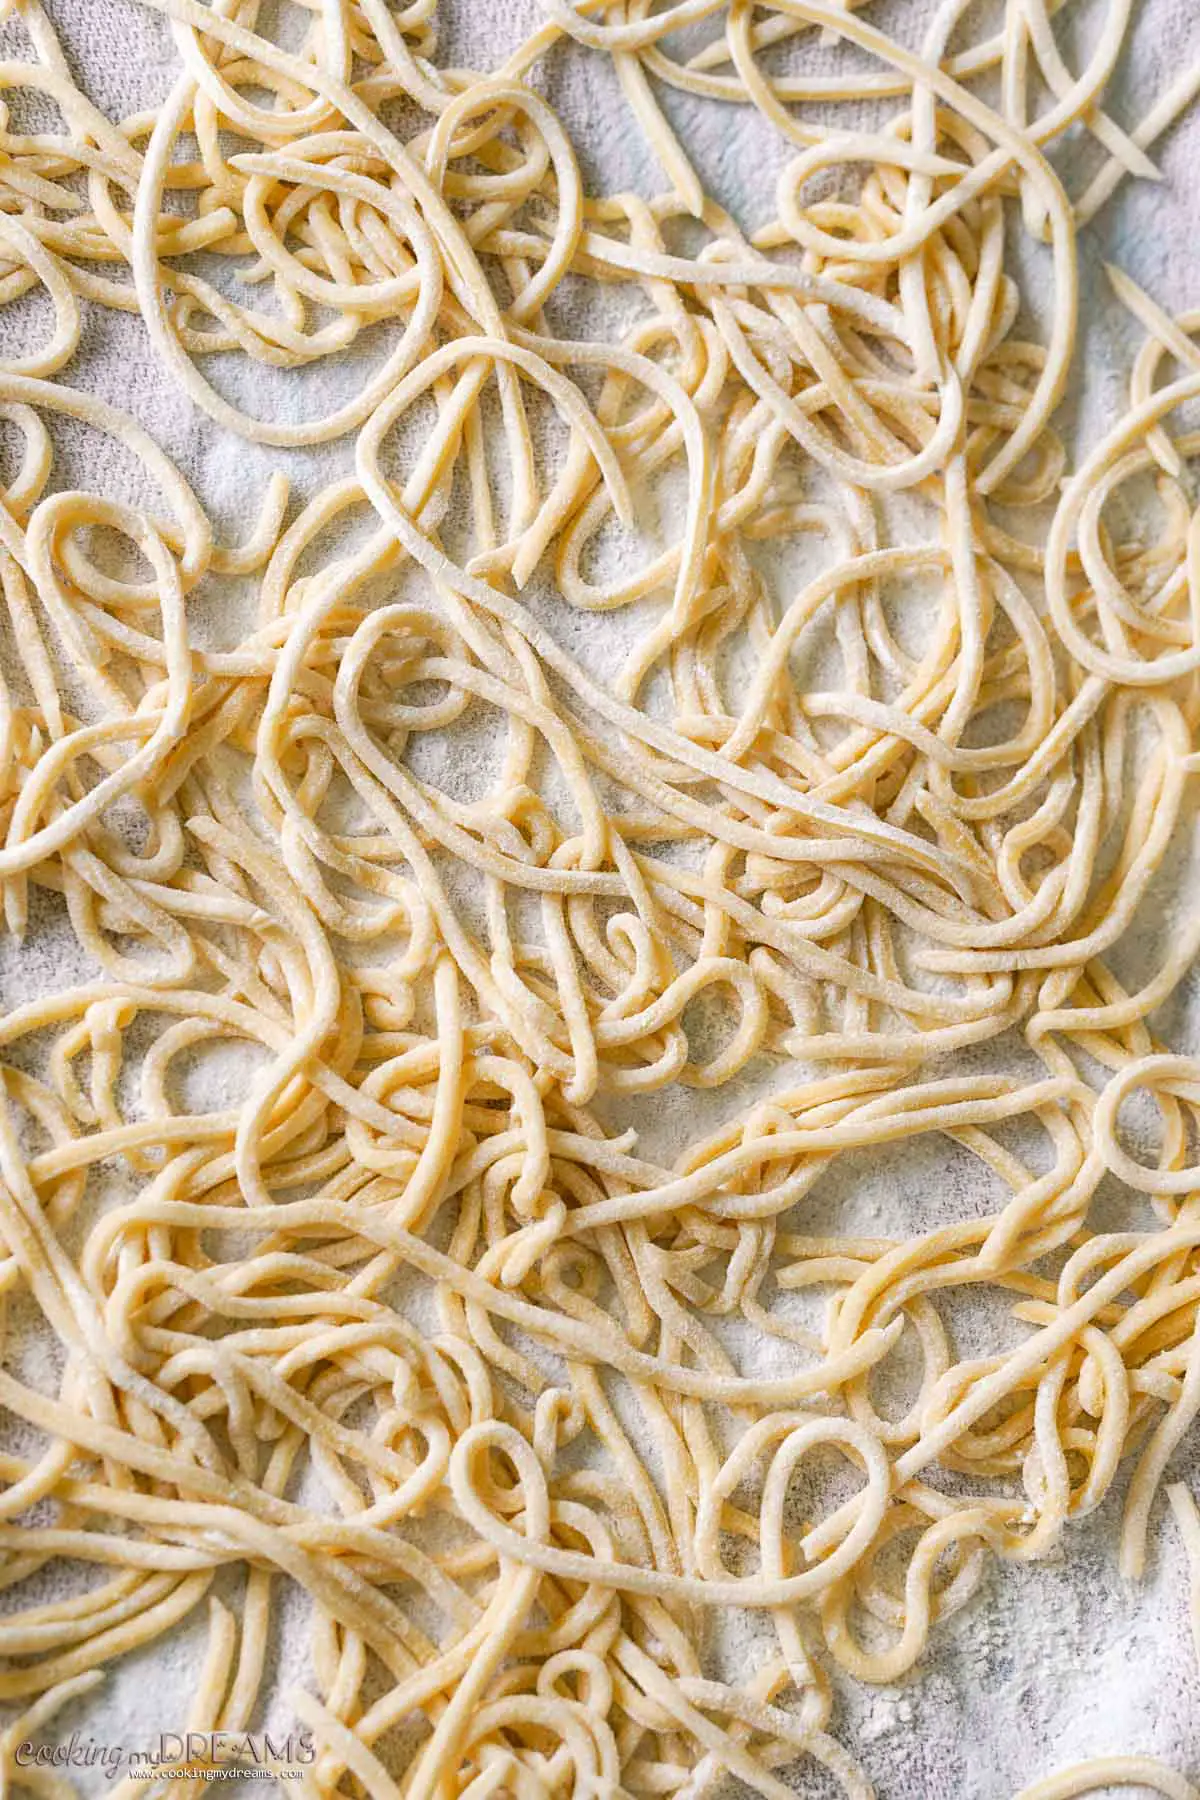
Finally, let your cut pasta dry for 15-20 minutes on a clean towel or a pasta rack before cooking. Make sure the pasta is well dusted with flour so it doesn't stick. This step is important to give the pasta a nice al dente bite when cooked.
Cooking and Serving
When preparing this tonnarelli recipe, aiming for an al dente texture is key. This ensures your pasta has the traditional firm bite. Start by bringing a large pot of salted water to a rolling boil. Add the tonnarelli a bit at a time and stir occasionally to prevent sticking.
Reserve a cup of pasta water before draining. The starchy water is a secret ingredient that helps to bind the sauce to the pasta, creating a silkier finish.
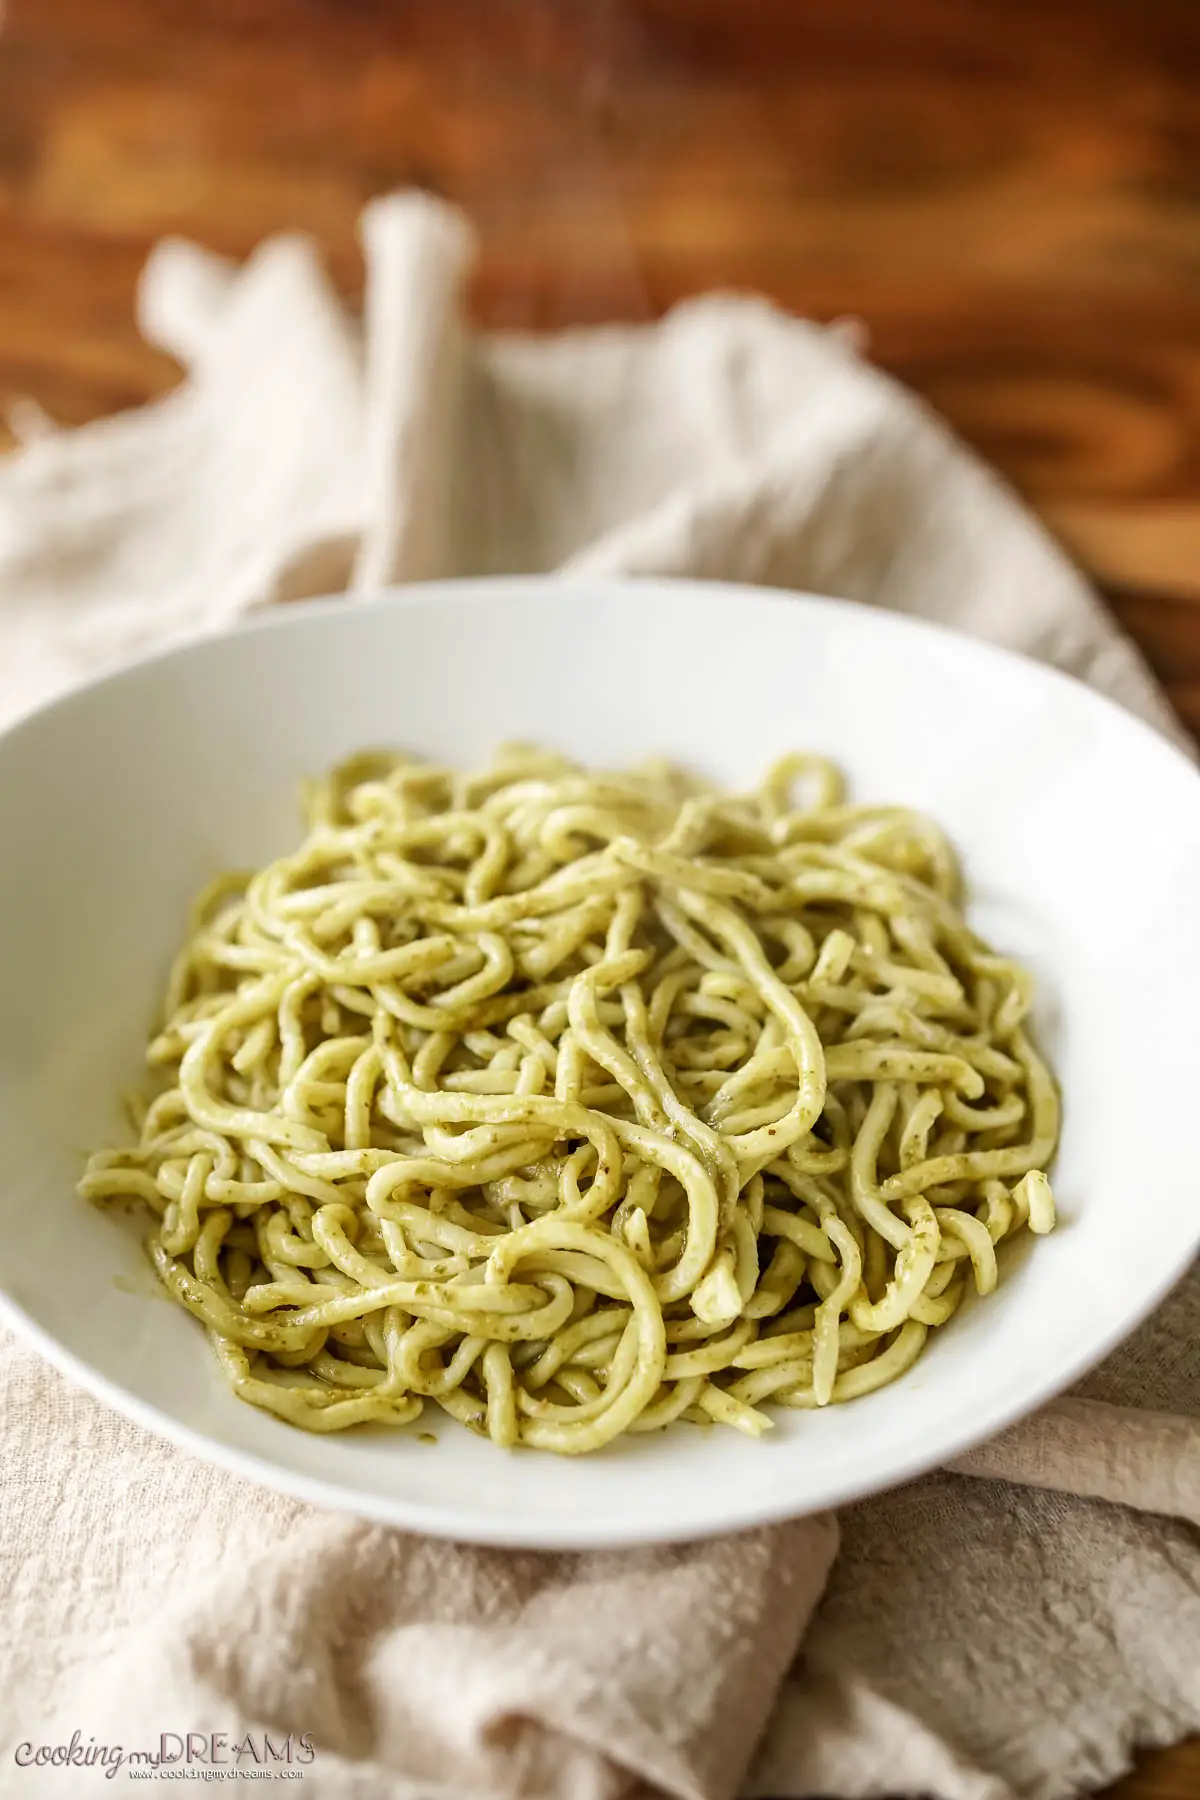
Cook the tonnarelli for 2-3 minutes and serve them immediately with the sauce of your choice for the best experience. Check this recipe to make the traditional Cacio e Pepe.
Tips for Perfect Tonnarelli
The most important thing to keep in mind when making tonnarelli is their shape. Make sure the pasta sheet is thick enough, then roll them on the chitarra tool or pasta machine to give them their classic square shape. Let the spaghetti alla chitarra dry 15-20 minutes before cooking.
Traditional Tonnarelli Dishes
Tonnarelli, a typical Roman pasta, also called spaghetti alla chitarra, have a square-cut shape and rough texture that make them ideal for clinging to rich sauces.
Cacio e Pepe:
This quintessential Roman dish requires only a few ingredients. Your tonnarelli must be cooked al dente, which then gets coated in a silky sauce made from Pecorino cheese and black pepper. The secret lies in balancing the starchy pasta water with the cheese to achieve a creamy emulsion.
Carbonara:
The authentic Roman carbonara pairs well with tonnarelli. For this, you need crispy guanciale (cured pork cheek), beaten eggs, pecorino, and pepper. Toss your tonnarelli in the pan with the guanciale, then off the heat, add the egg mixture to create a rich, creamy coating without scrambling the eggs.
Gricia:
A mix between Amatriciana and Cacio e Pepe. Gricia in a cheesy sauce made with pecorino romano cheese, black pepper, and fragrant crispy guanciale (cured pork cheek).
All'Amatriciana:
This sauce's spicy tomato base is enriched with guanciale and pecorino cheese. The robust flavors complement the starchy canvas of tonnarelli, ensuring each strand is suffused with taste.
While tonnarelli is traditionally handcrafted, requiring a tool known as a 'chitarra', you might also encounter the dish "Chitarra alla Teramana", often associated with the Abruzzo region. This dish typically includes meatballs or pallottine in a flavorful tomato sauce.
Each of these recipes celebrates the simplicity and elegance of Italian pasta dishes.
Pairing Sauces with Tonnarelli
Tonnarelli, a squared spaghetti pasta, requires delicious sauces that complement its heft and texture. You might be familiar with its customary pairings—cacio e pepe, carbonara, and gricia—but the possibilities extend beyond these classics, making some of the best pasta dishes.
For a refreshing change, try a robust tomato sauce. The acidity counters tonnarelli's richness, providing a zesty and invigorating taste. Adding basil can elevate this even further.
When it's basil season, pesto sauce is your go-to. The combination of basil, pine nuts, Parmesan cheese, garlic, and olive oil creates a vibrant and nutty sauce that adheres well to the pasta.
Lastly, consider ragù, a meat-based pasta sauce that brings a hearty, warming element to any pasta dish. Its slow cooking time allows for a depth of flavor that seeps into the folds of tonnarelli, making each bite satisfying. There are many types of ragù, like Tuscan ragù, Bolognese beef ragù, or even wild boar ragù.
Equipment
When embarking on the journey of making tonnarelli, having the right equipment is crucial. Tonarelli is a traditional Italian pasta, similar to spaghetti but with a square cross-section. To create this unique shape, certain tools are indispensable in your kitchen.
- Chitarra Pasta Tool: Central to the tonnarelli-making process is the chitarra (literally translating to 'guitar'). This wooden frame strung with parallel steel wires is what gives tonnarelli its signature texture. You simply roll the sheet of pasta dough over the chitarra and the wires cut it into the distinctive square strands.
- Pasta Machine: While not traditional for tonnarelli, a pasta machine can come in handy, especially when you need to roll your dough to an even thickness before using the chitarra tool. It ensures a precise starting point, leading to uniformly cut tonnarelli.
- Pasta drying rack: Not necessary, but useful to dry the tonnarelli and prevent them from sticking.

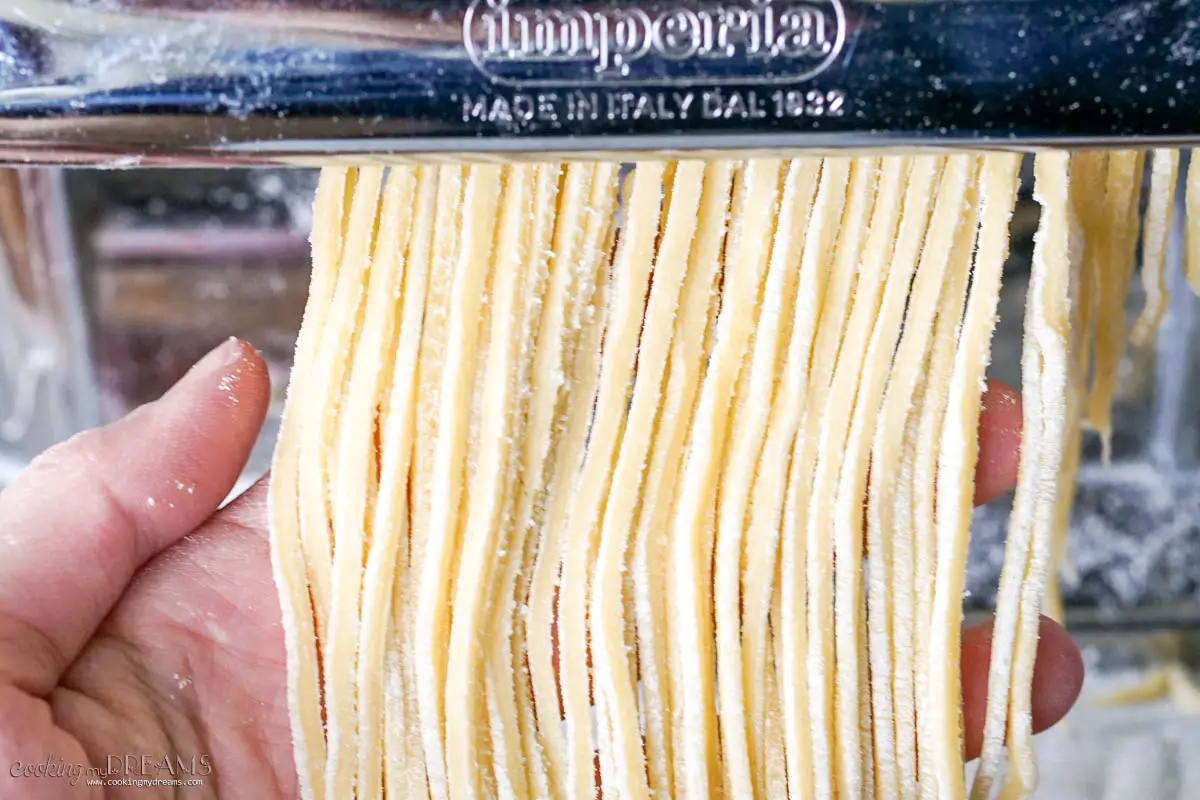
Remember, while tools like the chitarra honor tradition, a pasta machine aids the modern cook for consistency and ease. Selecting high-quality equipment will make your pasta-making experience not only successful but also deeply satisfying.
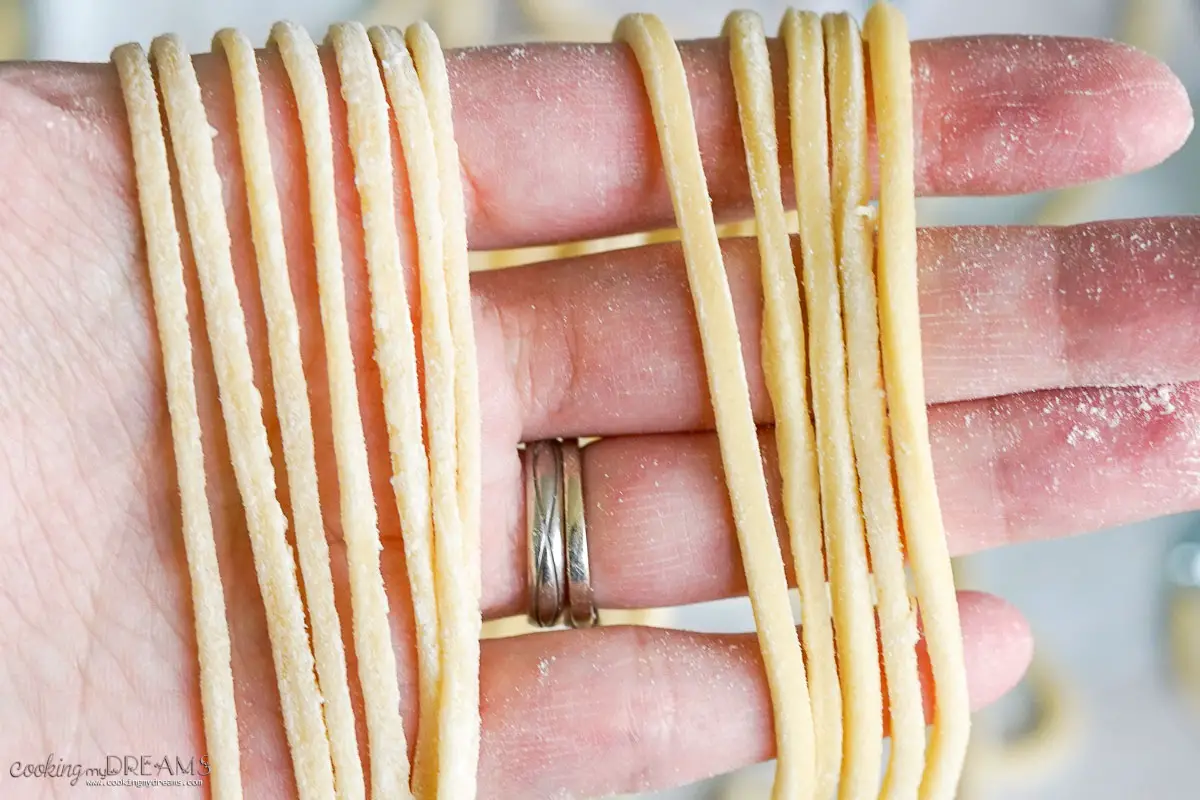
In the photo below you can clearly see the difference between tonnarelli made with a pasta machine (on the left, they're a bit thinner), and tonnarelli made with a chitarra tool (on the right, a bit thicker).
Storing and Reheating Tonnarelli
When you have leftover tonnarelli or have made a fresh batch you wish to enjoy later, proper storage is key to maintain its texture and taste.
- Fresh Tonnarelli: Allow to air-dry for about an hour if freshly made. Place in an airtight container or a sealed plastic bag. Store in the refrigerator for up to 3 days. This method is not recommended as they might stick together due to the cool humidity.
- Cooked Tonnarelli: Cool to room temperature. Toss with a small amount of oil to prevent sticking. Refrigerate in an airtight container for up to 5 days.
- Freezing: Lay the pasta on a baking sheet, freeze until solid, then transfer to freezer bags. Can be frozen for up to 3 months.
Frequently Asked Questions
Tonnarelli is a thicker, square-cut pasta with a rough texture, differing from the round, smooth spaghetti. Its preparation typically involves a dough of semolina flour and eggs that's rolled out and cut, not extruded like spaghetti.
Tonnarelli pairs well with robust sauces like carbonara, cacio e pepe, and amatriciana. Its dense texture holds onto these creamy or hearty sauces, ensuring a flavorful bite every time.
Yes, you can freeze tonnarelli. Lay the pasta flat on a tray to freeze individually, then transfer to an airtight container. This method prevents the strands from sticking together.
Tonnarelli can be made without a machine by rolling the dough with a rolling pin to a 2-3 mm thickness and cutting it into strips. Pasta cut this way will have a pleasantly uneven texture.
Related Recipes
If you tried this recipe, please take a moment to rate it and share your thoughts in the comments. Your feedback means a lot to me! ★★★★★
📖 RECIPE
Tonnarelli Pasta
Equipment
Ingredients
- 2 large Eggs
- 1 cup All-Purpose Flour
- ½ cup Semolina Flour
- a pinch Salt
Instructions
- Pour ¾ of the flours in a bowl or on a work surface. Add a pinch of salt, then make a hole in the center.
- Add the eggs in the center, then with a fork start whisking them and slowly add a little bit of flour at a time.
- When the dough becomes too thick and sticky, start kneading with your hands, for about 10 minutes, adding more flour if necessary.
- When you have a soft uniform dough, cover it with plastic wrap and set it aside or in the fridge to rest for 15-20 minutes.
- Split the dough in 2-3 parts, then take one out and cover the rest again with plastic wrap. Dust the dough with flour, then flatten it with your hands.
- Roll the dough using a pasta machine or the rolling pin making pressure from the center outwards. Turn and flip the dough often to make it even and add more flour if it becomes sticky.
- When the dough is uniformly thick (thickness 4 on the Imperia machine), roll it on the chitarra pasta cutter.
- Set the tonnarelli on a clean towel or a pasta drying rack to dry for 15-20 minutes before cooking. Dust them well with flour to prevent sticking.
- Cook in salted boiling water for 2-3 minutes before adding to your chosen sauce.
Notes
- Fresh Tonnarelli: Allow to air-dry for about an hour if freshly made. Place in an airtight container or a sealed plastic bag. Store in the refrigerator for up to 3 days. This method is not recommended as they might stick together due to the cool humidity.
- Cooked Tonnarelli: Cool to room temperature. Toss with a small amount of oil to prevent sticking. Refrigerate in an airtight container for up to 5 days.
- Freezing: Lay the pasta on a baking sheet, freeze until solid, then transfer to freezer bags. Can be frozen for up to 3 months.
Nutrition
Nutritional information is only an estimate. The accuracy of the nutritional information for any recipe on this site is not guaranteed.




Leave a Comment